
This is Part 7 of a 10 part Natural Light Photography Series.

Mako Shark off Cabo San Lucas, MX. 1/400, f/9, ISO 800
In underwater photography, especially with fast-moving or large animals, getting sharp images can be a challenge.
This is where understanding and effectively using your camera’s focus points becomes critical. The right focus settings can make all the difference in ensuring your subject, not the distractions around it, is captured clearly.
Why Wide Dynamic Autofocus Works Best
For big animals like sharks, whales, or dolphins, I always use a wide dynamic autofocus area. Shooting underwater often means you’re working without the luxury of looking through the viewfinder. Instead, you’re shooting “blind,” with your arms extended to get closer to the subject.
Using a single-point autofocus in these situations significantly increases the risk of missing your shot, as it’s nearly impossible to keep that one focus point on a moving target. A wide focus area ensures the camera tracks your subject even when you’re not perfectly aligned.
Limit the Autofocus Area
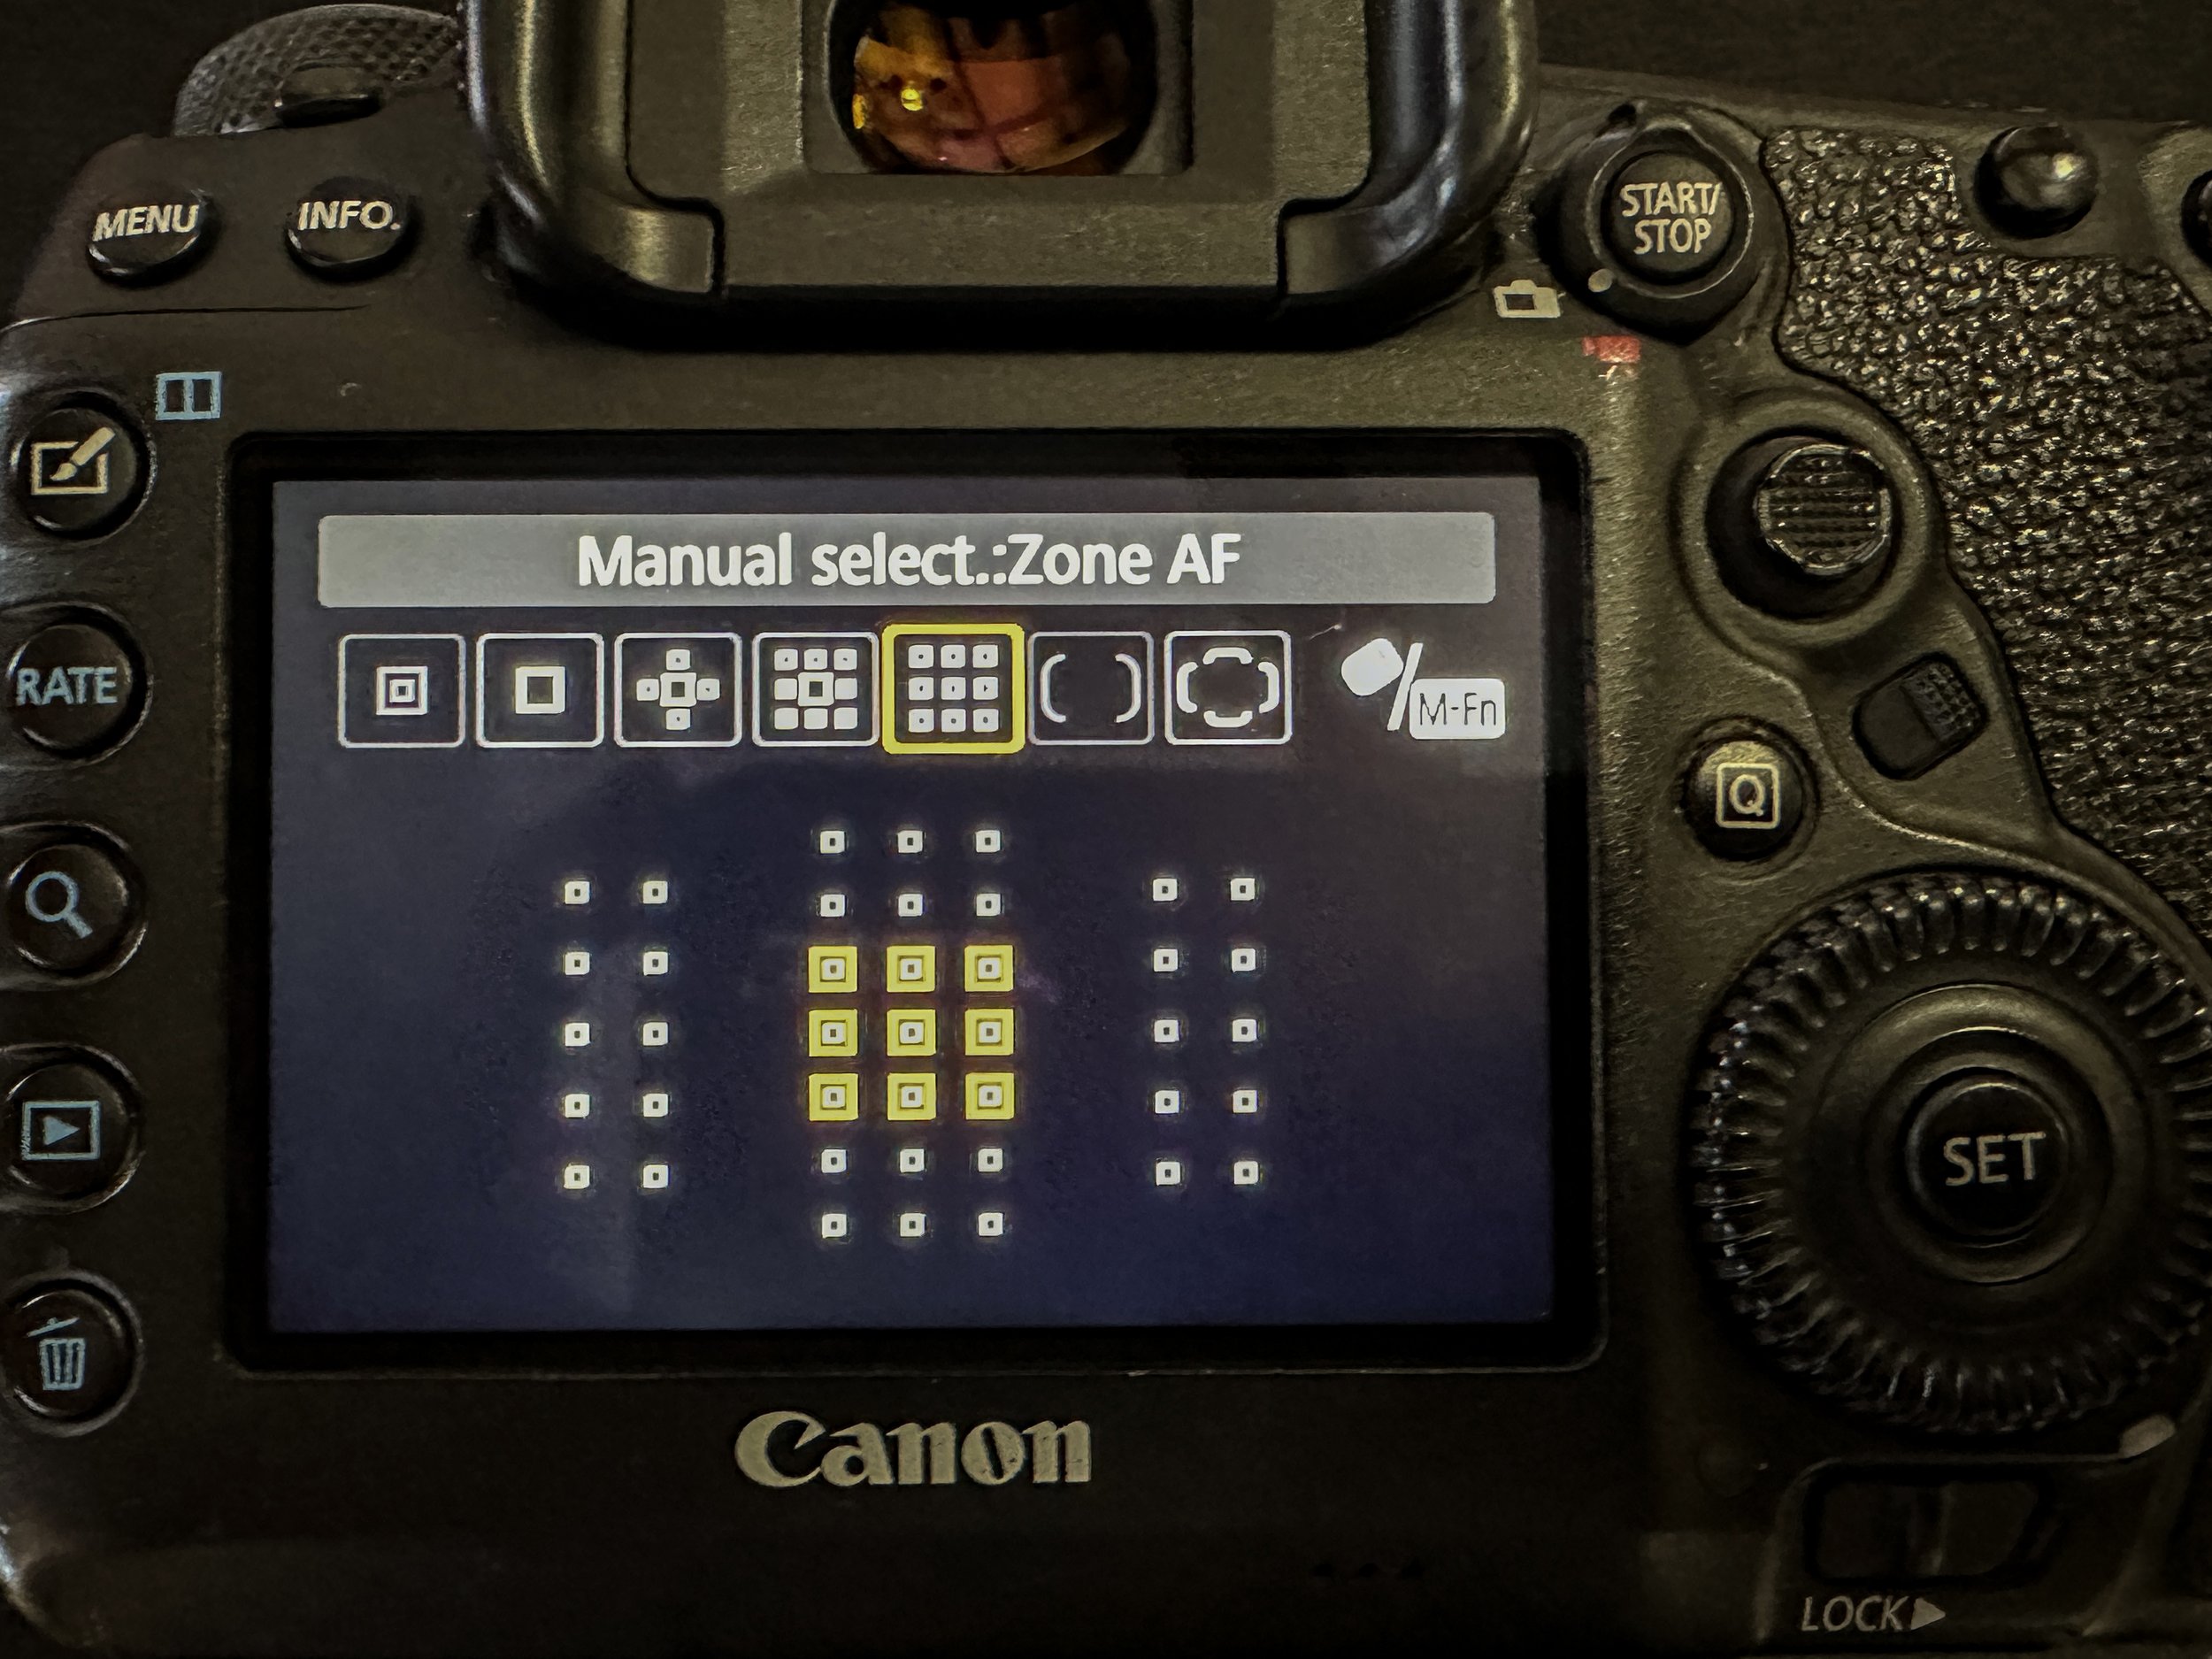
While wide autofocus is essential, I don’t recommend activating all your focus points across the frame. Instead, I narrow the focus area to the center region, activating 9 to 15 focus points. This approach minimizes the chance of your camera locking onto distractions, such as:
Fish swimming around your subject
Particles in the water
Other divers or objects in the background

Sailfish hunting sardine baitball off Baja, MX. 1/640, f/8, ISO 1600

Silky shark with pilot fish off Cabo San Lucas, MX. 1/320, f/10, ISO 800
By concentrating your focus area, you increase the chances of keeping your primary subject, the big animal, sharp and detailed.
Common Challenges with Focus Points
Big animals often have smaller companions, like fish swimming alongside sharks, that can steal your camera’s focus. This is similar to photographing a bird in a tree and accidentally focusing on the branch instead. By narrowing the focus area, you ensure your subject remains the priority.
Another challenge is rapid movement. Wide dynamic autofocus helps here by tracking your subject across multiple points, even as they shift position or change direction.
Practical Tips for Using Focus Points
Customize Your Focus Area: Experiment with limiting your autofocus points to the center region to see what works best for your shooting style.
Communicate with Dive Buddies: If you plan to use their gear (like tanks or fins) as a focus reference during custom white balance or framing, let them know beforehand to avoid confusion. So it doesn’t get weird.
Practice Shooting Blind: Familiarize yourself with positioning and angles so you can effectively capture sharp images even without looking through the viewfinder.

Great White off Guadalupe Island, MX. 1/320, f8, ISO 400.
The Debate: Single Point vs. Wide Dynamic
Some photographers advocate for single-point autofocus, but this approach works best when you’re shooting through the viewfinder and can track your subject.
For underwater photography, where conditions are more dynamic and you’re often shooting from less stable positions, wide dynamic autofocus provides greater flexibility and reliability.
Final Thoughts
Mastering focus points is an essential skill for underwater photographers, especially when working with large, fast-moving animals.
By using a wide dynamic autofocus area with a limited central region, you can strike the perfect balance between precision and adaptability, ensuring your subjects are always sharp.

Striped marlin hunting sardines off Baja Mexico. 1/640, f/8, ISO 1600
Coming Next
In the next blog, we’ll explore the histogram, a powerful tool for checking exposure underwater. Learn how to use this graph to fine-tune your settings and avoid common exposure mistakes. Stay tuned!
THIS IS PART 7 OF A 10 PART SERIES.
PART ONE - Is Natural Light Photography Photography For You?
PART TWO - The Euphotic Zone! Your best friend.
PART THREE - Custom White Balance, Natural Lights Secret Weapon.
PART FOUR - Shutter Speed: Freezing Moments Underwater.
PART FIVE - Aperture: Achieving Sharpness and Depth Underwater
PART SIX - ISO: Balancing Light Sensitivity Underwater
PART SEVEN - Focus Points: Keeping Your Subject Sharp Underwater
PART EIGHT - The Histogram: Your Underwater Photography Lifeline
PART NINE - Post-Processing: Bringing Your Underwater Images to Life.
PART TEN - The Freedom of Natural Light Photography: A Connection to the Wild


