
This is Part 6 of a 10 part Natural Light Photography Series.

1/320, f/9, ISO 1000
ISO is one of the most critical settings in underwater photography, especially when shooting with natural light.
It determines your camera’s sensitivity to light and plays a key role in achieving proper exposure.
While increasing ISO can brighten your image, it also introduces noise, which can reduce image quality.
In this blog, I’ll share my approach to setting ISO for natural light photography and explain why manual control is the way to go.
Why I Avoid Auto ISO
Some photographers rely on auto ISO to adjust their settings dynamically, but I’ve never been satisfied with the results underwater.
Auto ISO often overcompensates, leading to images that are too bright or too noisy.
Instead, I prefer to set my ISO manually and use my histogram to fine-tune my exposure. This gives me complete control and ensures my images are consistently well-balanced.
Starting Points for ISO
The amount of sunlight, water clarity, and depth all influence how I set my ISO. Here are my go-to starting points:
Bright Sunlight with a Sandy Bottom:
ISO Setting: 400
Why: The sand reflects sunlight, providing plenty of natural light to work with.
Deep Water with No Bottom in Sight:
ISO Setting: 800
Why: Without a reflective surface, less light reaches your subject, so a higher ISO compensates for the loss.

1/320, f/9, ISO 1000
Using the Histogram to Adjust ISO
Before finalizing my ISO, I rely on my histogram to check exposure. Here’s how I approach it:
Perform a 360-Degree Spin:
I do a full turn in the water to observe how light changes depending on my angle to the sun. This helps me find a middle ground that works, even if I’m facing slightly toward the sun.
Fine-Tune with the Histogram:
The histogram provides an objective way to evaluate whether my exposure is balanced, allowing me to adjust ISO as needed.
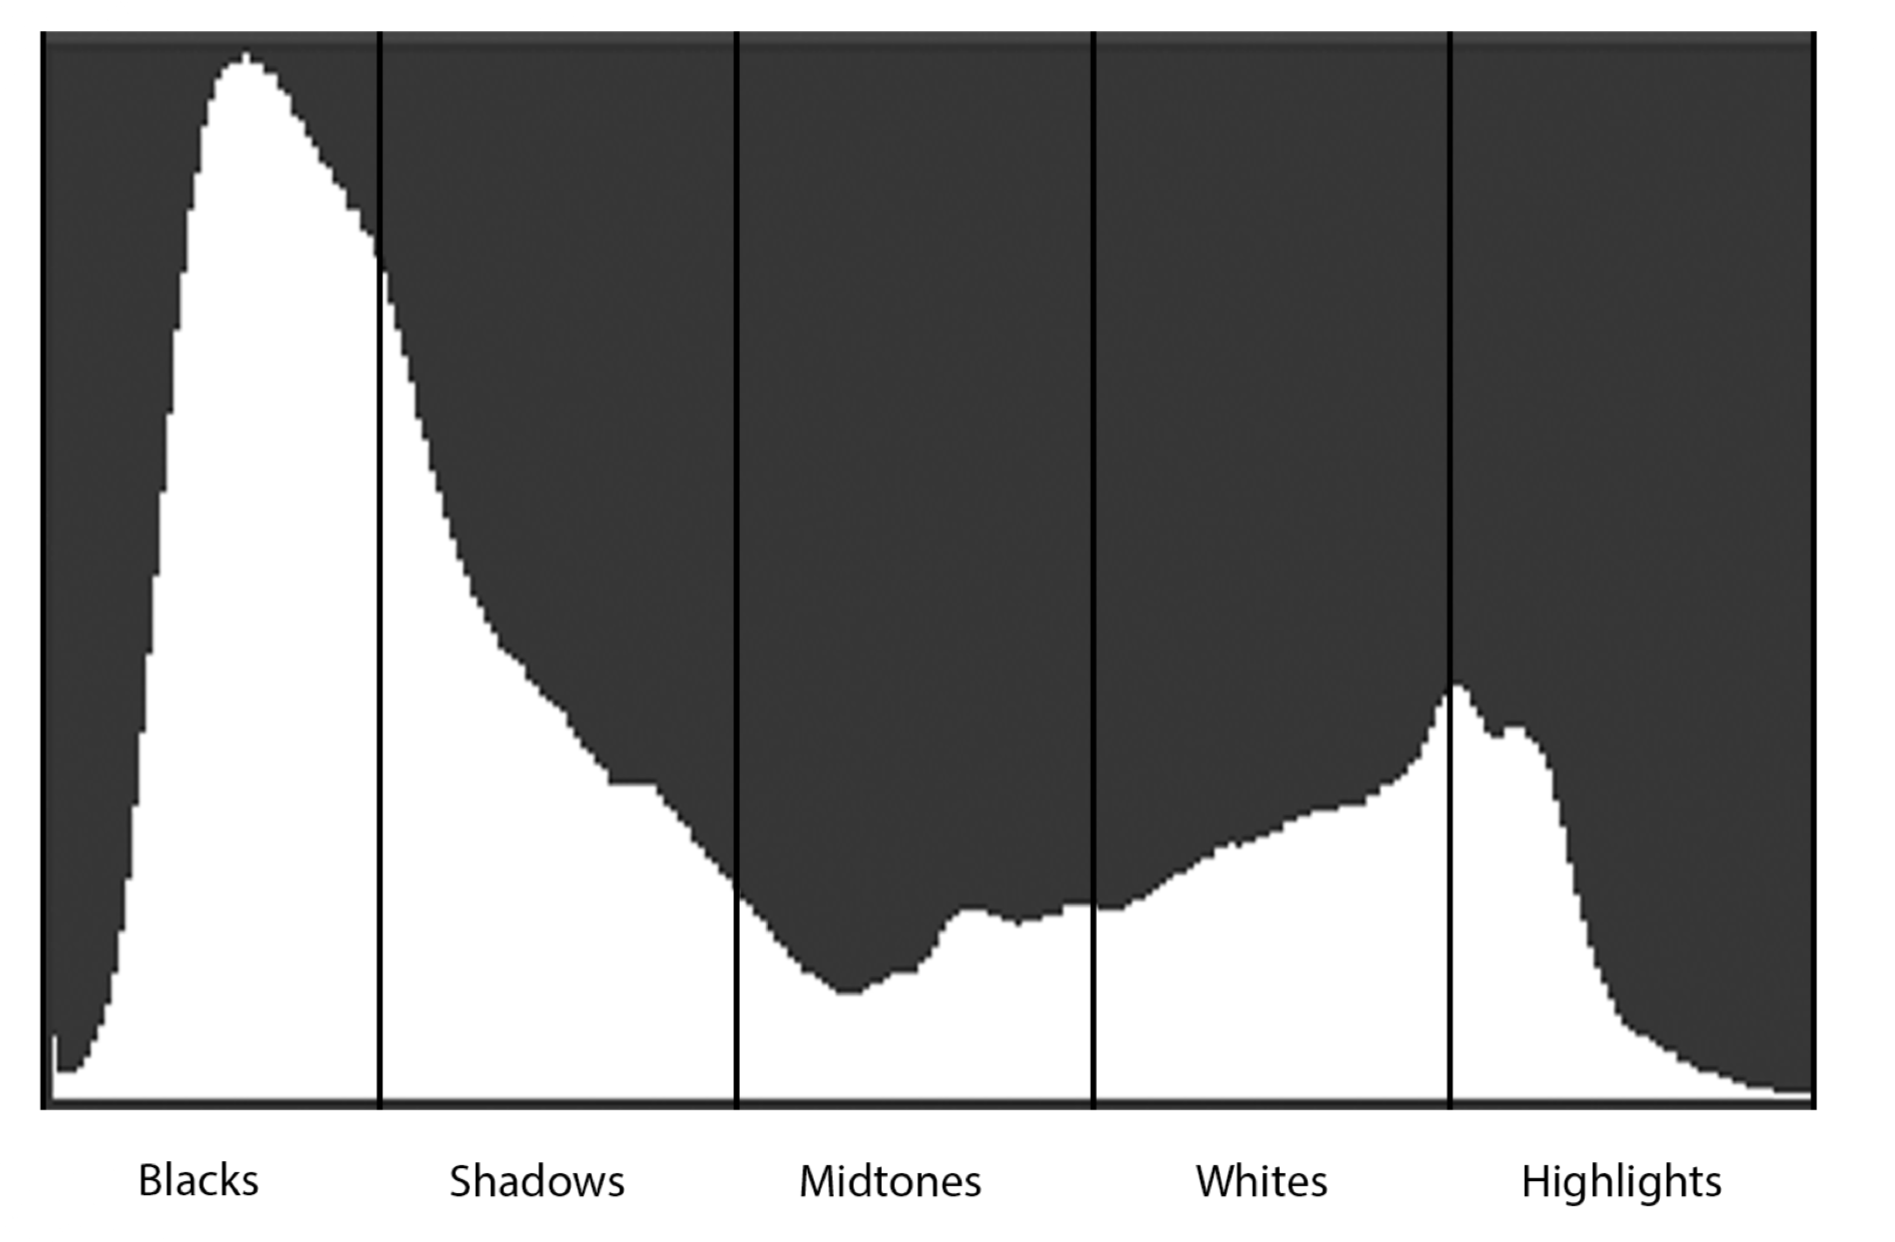
How to read your Histogram.
When to Adjust ISO
Increase ISO:
In low-light conditions, such as cloudy days, deep dives, or early morning/late afternoon shoots.
To freeze fast-moving subjects when a faster shutter speed is needed.
Decrease ISO:
In bright, shallow water with excellent visibility.
When you’re close to your subject and don’t need the extra light sensitivity.
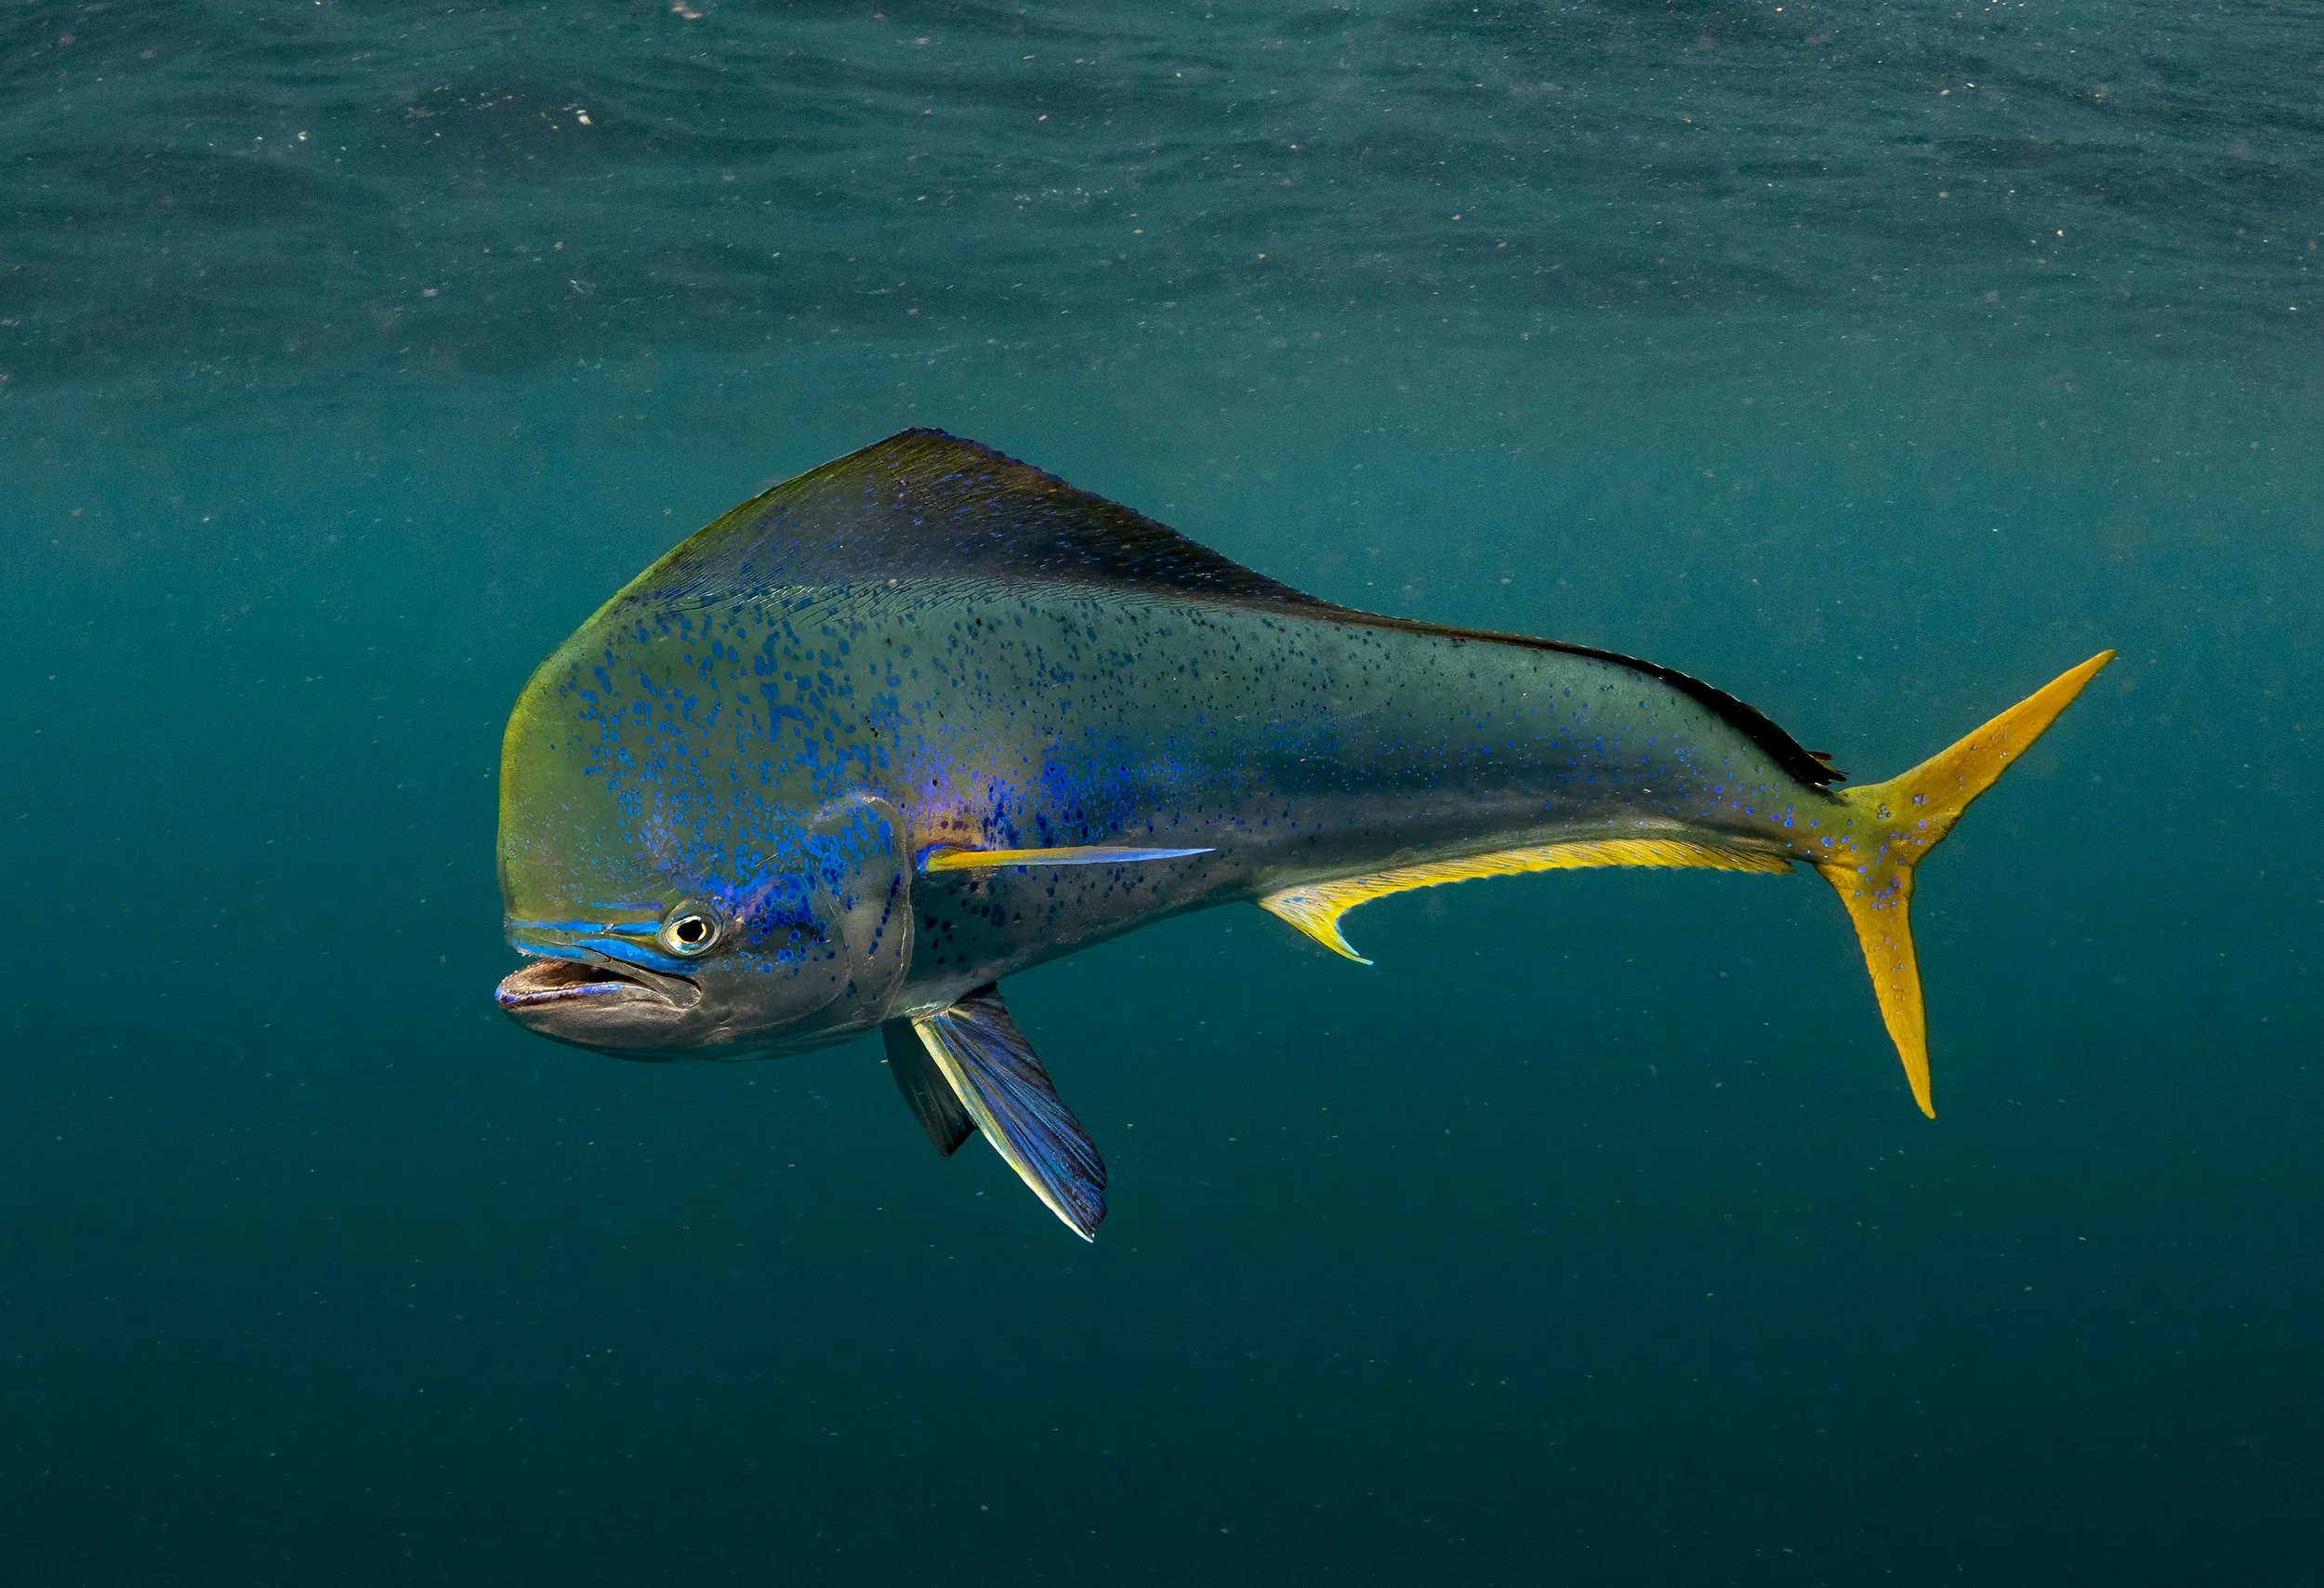
1/320, f/9, ISO 1000
Practical Tips for ISO Underwater
Start Low, Adjust Gradually: Begin with a lower ISO setting (e.g., 400) and increase as necessary based on light conditions.
Minimize Noise: Keep ISO as low as possible while maintaining proper exposure to reduce graininess in your images.
Test in Different Environments: Practice adjusting ISO in various conditions to better understand how your camera handles light sensitivity and noise underwater.

1/320, f/8, ISO 1000
The Power of Manual ISO
Controlling ISO manually gives you the flexibility to adapt to the ever-changing underwater environment.
Whether you’re shooting in shallow tropical waters or deep, murky conditions, understanding how to adjust ISO effectively will ensure your images are sharp, vibrant, and properly exposed.
Coming Next
In the next blog, we’ll discuss Focus Points and how to use them to keep your subjects sharp, even when shooting blind with big animals. Stay tuned for tips on mastering focus in the dynamic underwater world!
THIS IS PART 6 OF A 10 PART SERIES.
PART ONE - Is Natural Light Photography Photography For You?
PART TWO - The Euphotic Zone! Your best friend.
PART THREE - Custom White Balance, Natural Lights Secret Weapon.
PART FOUR - Shutter Speed: Freezing Moments Underwater.
PART FIVE - Aperture: Achieving Sharpness and Depth Underwater
PART SIX - ISO: Balancing Light Sensitivity Underwater
PART SEVEN - Focus Points: Keeping Your Subject Sharp Underwater
PART EIGHT - The Histogram: Your Underwater Photography Lifeline
PART NINE - Post-Processing: Bringing Your Underwater Images to Life.
PART TEN - The Freedom of Natural Light Photography: A Connection to the Wild


